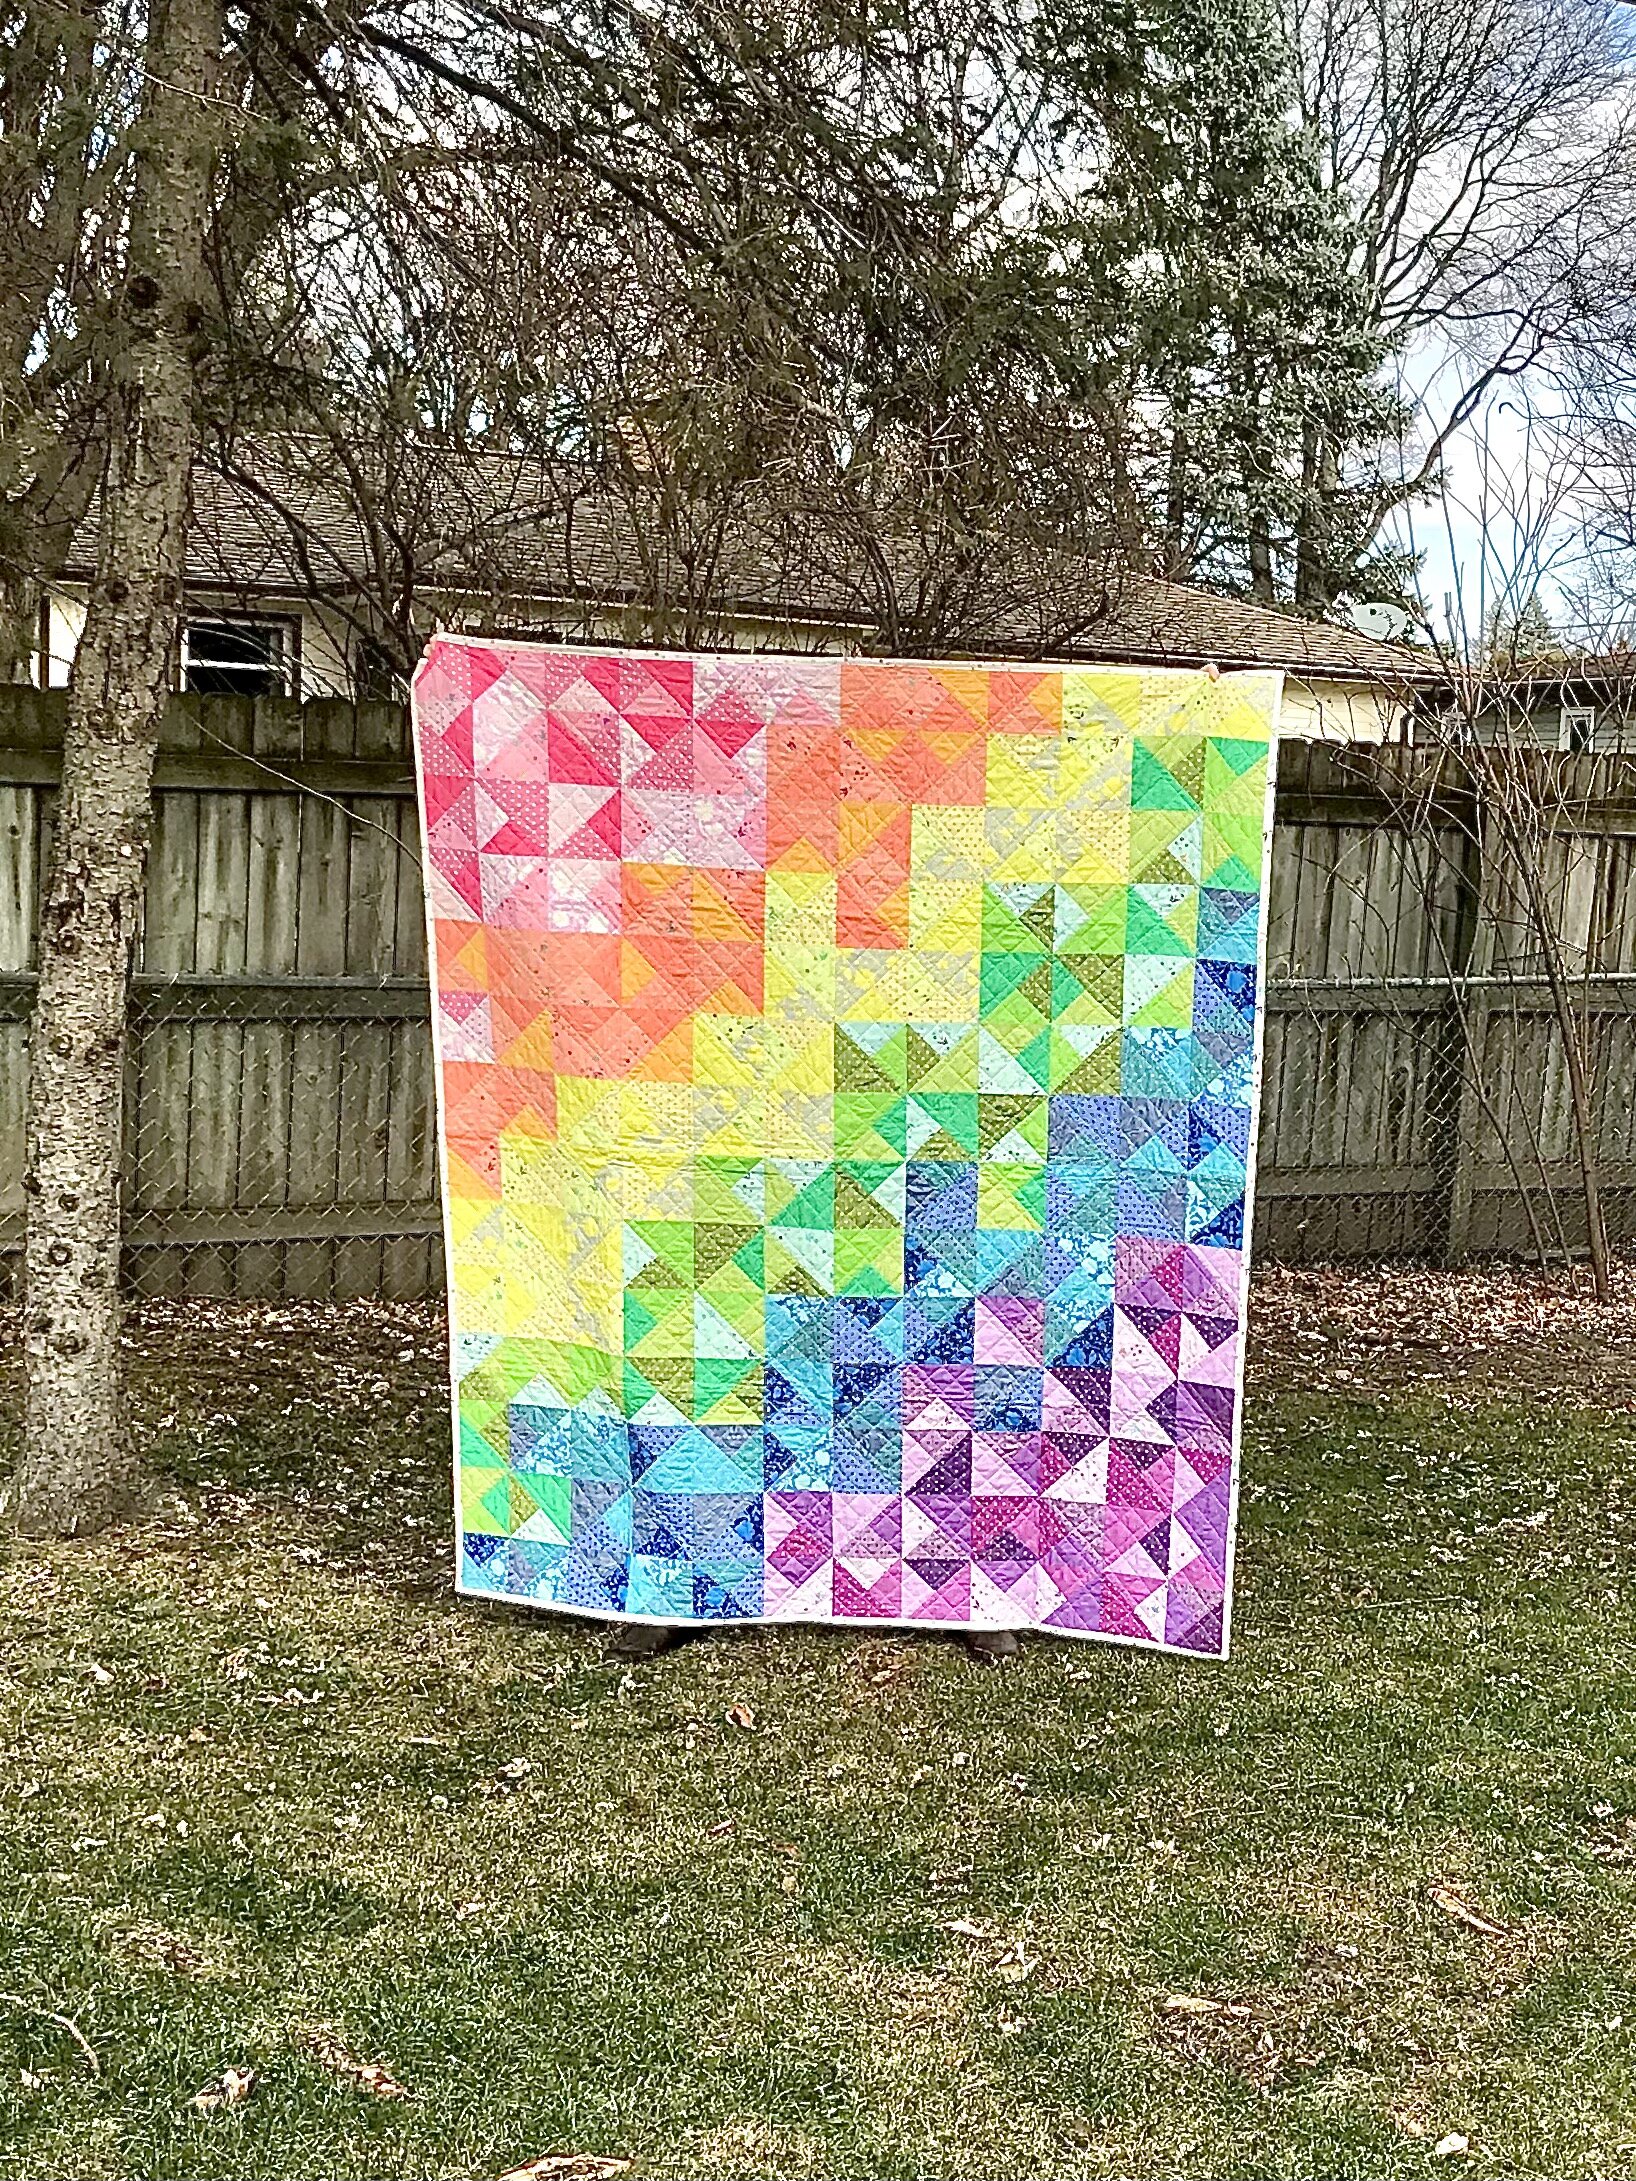
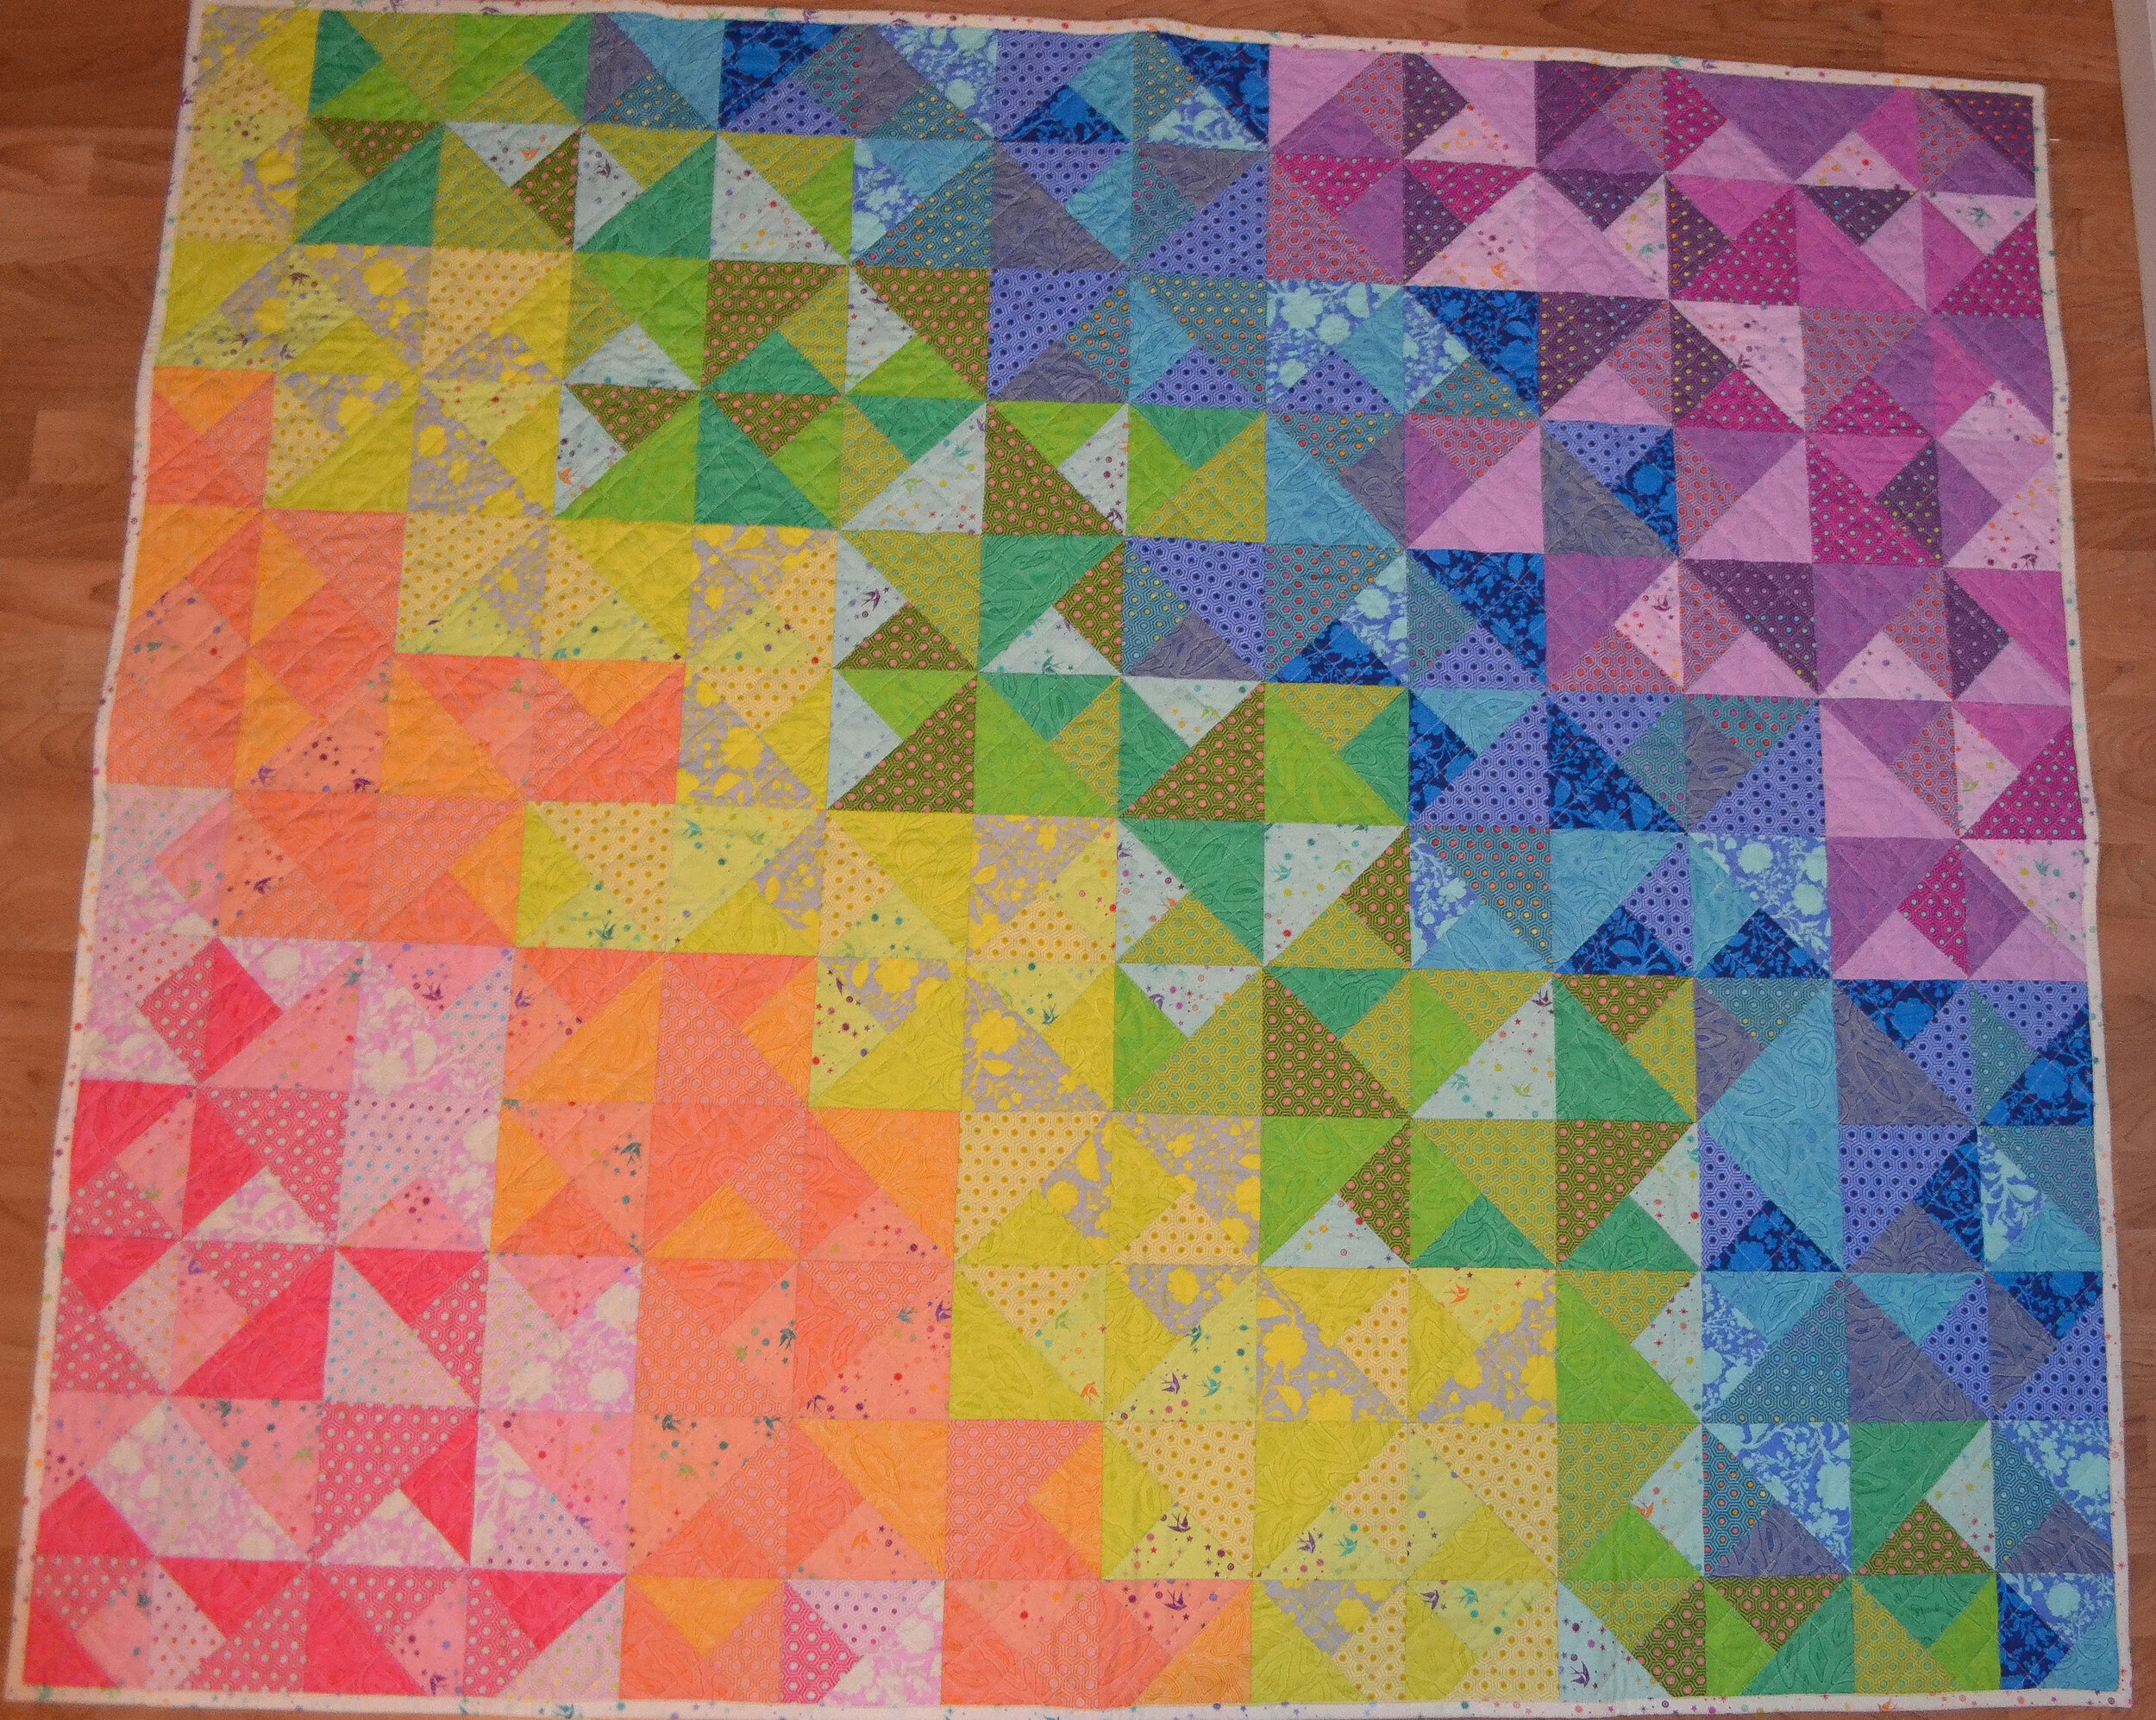
Gradient Rainbow Quilt

Rainbow Quilt – Tula Pink True Colors
Here’s the thing, sewing is therapeutic. It allows you to think as much as you want to. This quilt took a little (let’s be real A LOT!) more brainpower than a relaxing quilting session. I saw a similar quilt on Pinterest and just knew I had to replicate it. Sometimes a fabric creates the quilt, that was the case in this situation. Finding the Tula Pink fabic line was the starting point for this design.
I started with my good old graph paper and sketched out the design. Knowing I wanted to use triangles to create the blocks it was relatively easy to set it up. Then came the first challenge; coloring. The coloring had to be perfect, I simply ROYGBIV’d (for all you non science/color nerds: Red, Orange, Yellow, Green, Blue, Indigo, Violet) it. Easy peasy! Breaking down that map into the exact fabrics was the real challenge. When using a fabric line most times, like with the True Colors, the patterns are made in different color options. My ideal quilt pattern minimized having two fabrics of the same pattern next to each other. There was some trial and error, but ultimately to save my sanity I just went with it.
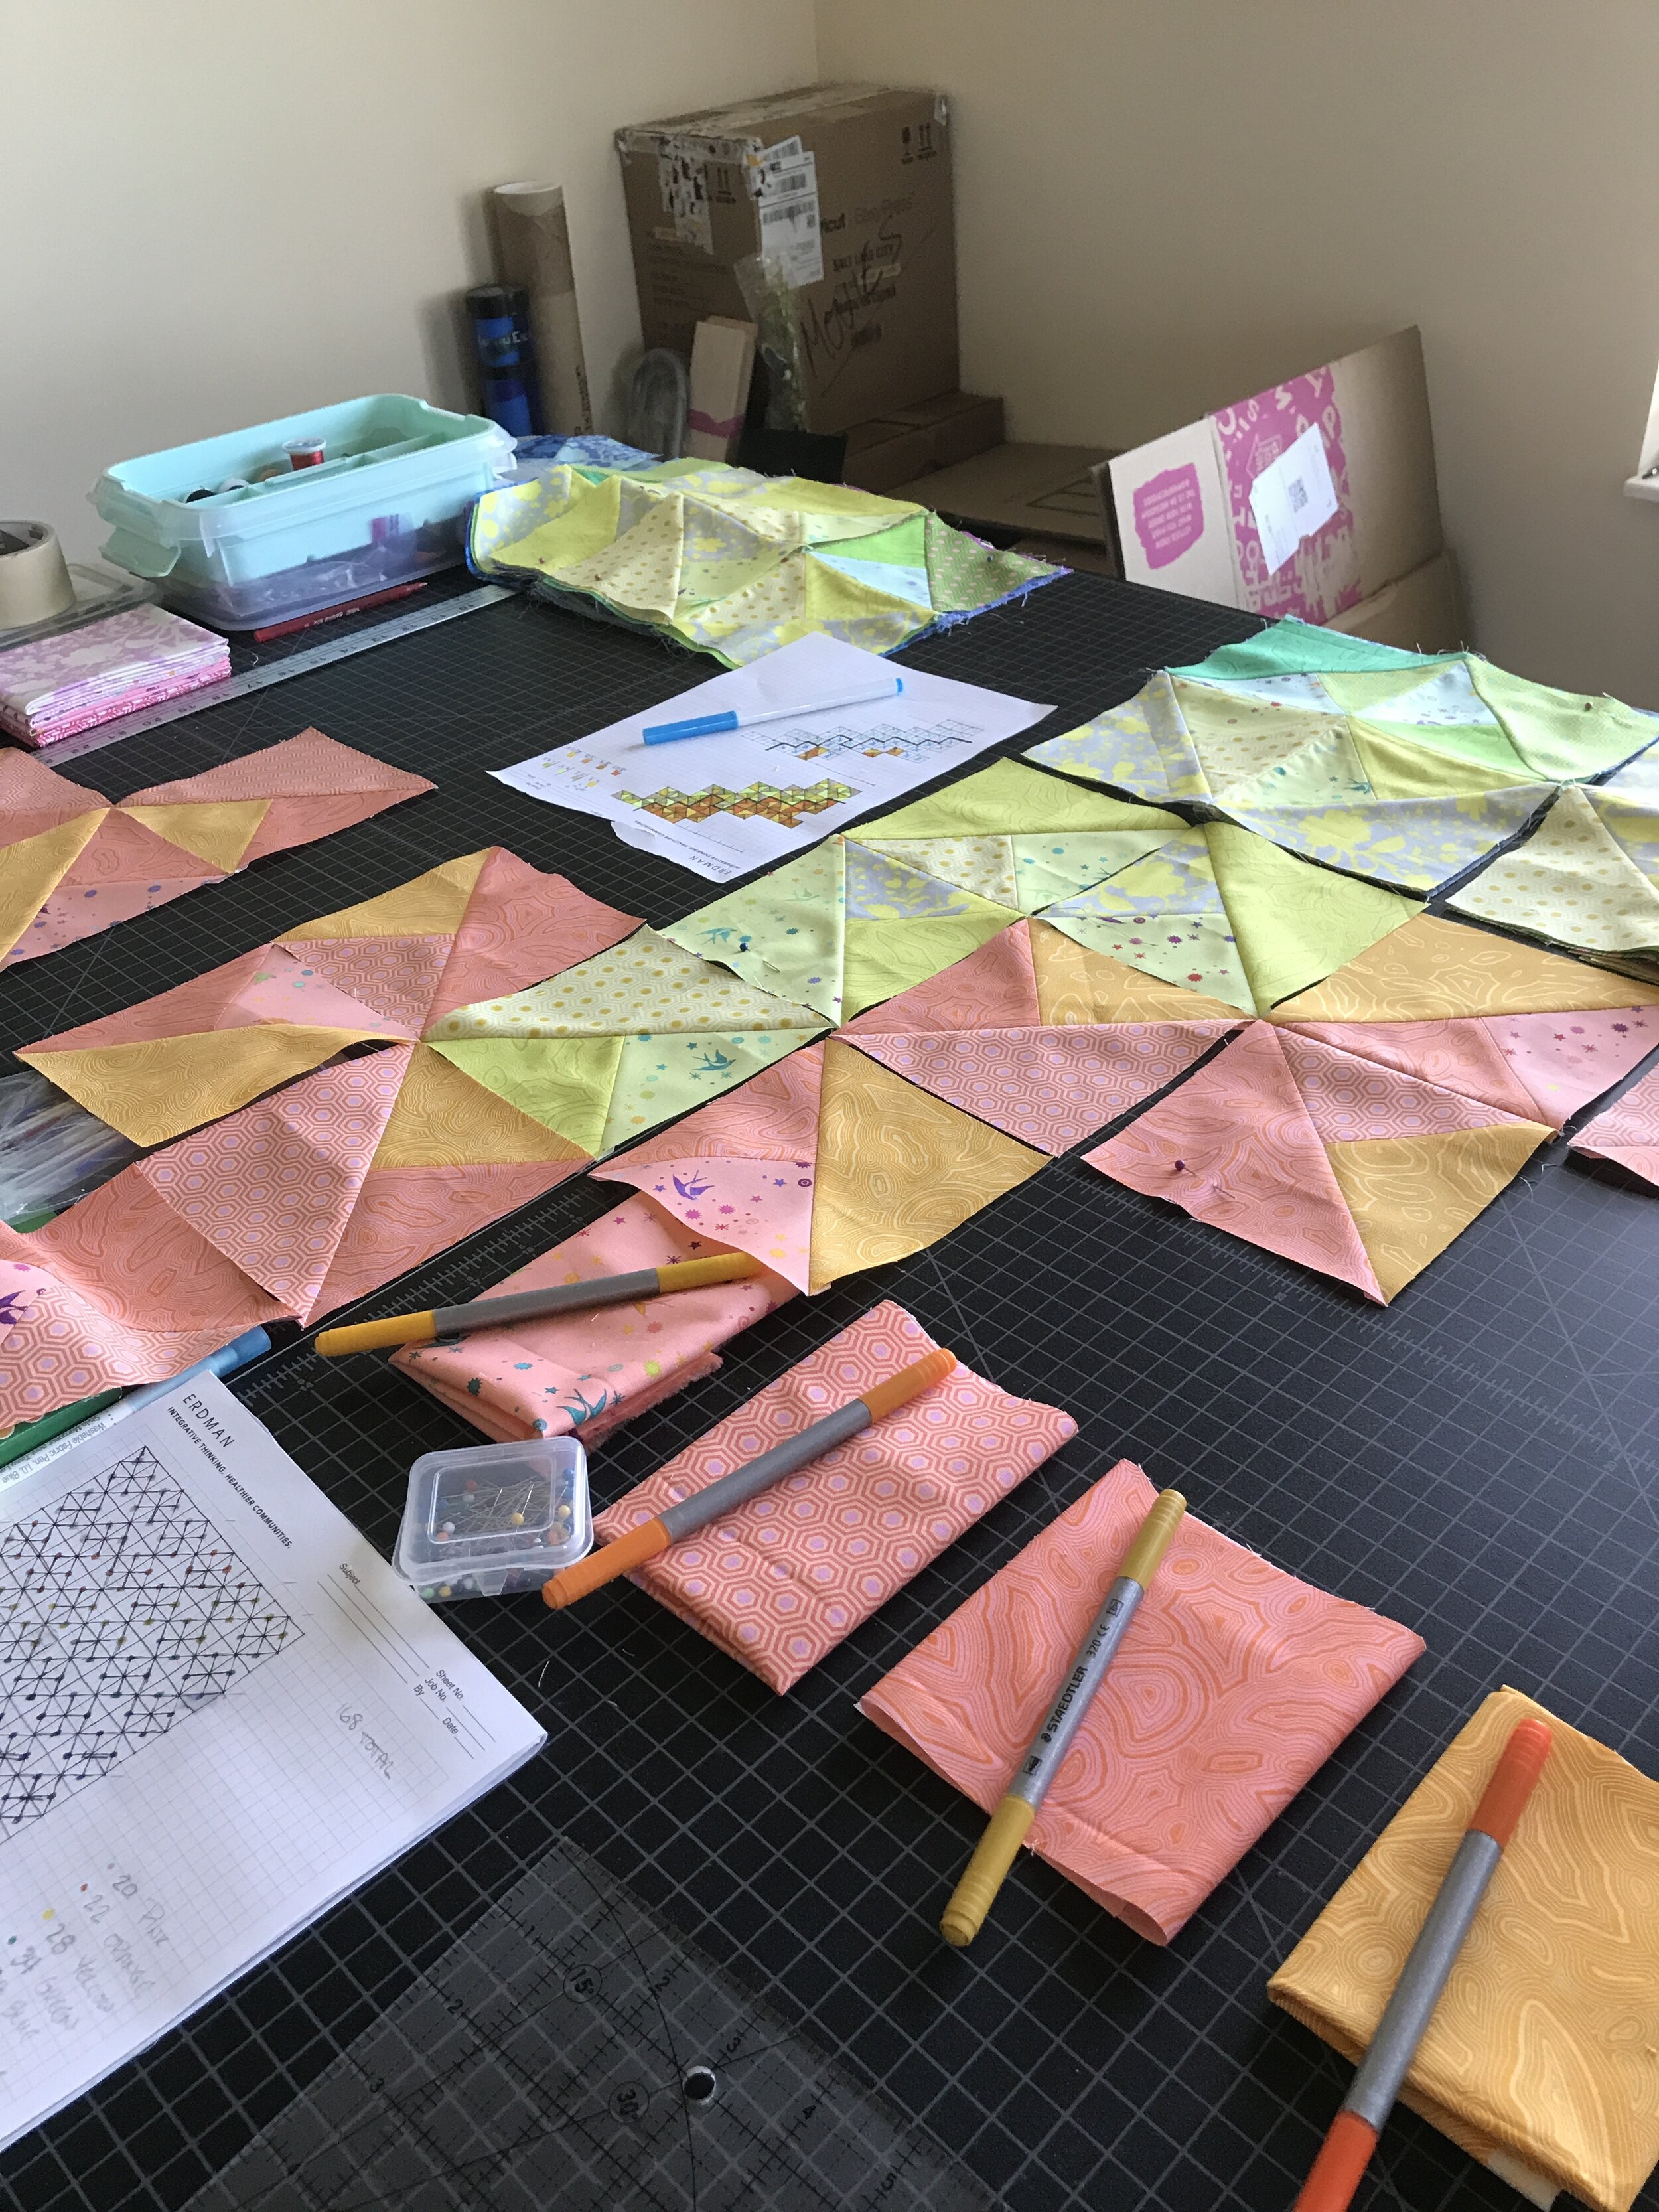
Cutting oh so many 5”x5” squares to be worked in. Having no negative space in this quilt made it entertaining and fun, but also removed the wiggle room a solid color gives a quilt. Even with my color coded quilt pattern, I made mistakes. I would flip fabrics, chose the wrong piece, have to seam rip, and all those other challenges that make quilting, dare I say, fun! That’s what makes this exciting for me. The experiments and difficulties, the problem solving, and seeing the final product turn out better than you could imagine.
With the lack of negative space, I wanted the backing of this quilt to be mostly neutral. Tula Pink has some great eye catching fabrics in bright rainbow colors. Choosing just one solid color would have been a struggle. The creaminess backing with the slight pops of color was the perfect choice.
Quilting this bad boy was a task! My domestic sewing machine is a champ! I feel like he/she needs a name. I’m open to suggestions! This is the first throw size quilt I’ve quilted. I learned that the right tools make thing go much smoother. Like grippy quilting gloves and a guide bar (I used a pencil taped to my machine this time around… like I said, my machine is a champ!). At first, I was exhausted after quilting in one direction, and thought I could get away with being done. I am so glad I slept on my decision and did the opposite direction the next day. It’s so much fun to see a project you’ve spent so much time thinking about come together.
Squaring up a quilt and binding are the finishing touches to any quilt. I found from a random Instagram post, a square laser level is the tool to have when squaring up a quilt. This was the first quilt I used it with, and I am never going back to rulers again! You’ll need a darkish room to see the laser lines nicely, but is SO worth it! Having to trust a level and not your own brain is a lifesaver at this point in a project! I am a firm believer in machine sewing bindings. Yes, there is a personal touch to hand stitched binding, but there is just as much whimsy in a perfectly machine stitched binding.
This quilt gave me hope, confidence, and showed me this dream I have for my business can and will become a reality. Whenever the self-doubt comes in, all I have to do is look back on this quilt. The Gradient Rainbow that started it all.
Head to my shop to see all available quilts and fabric!
To see more final images and buy this quilt click on the photo below!